|
|
||
|
|
||
 |
||
|
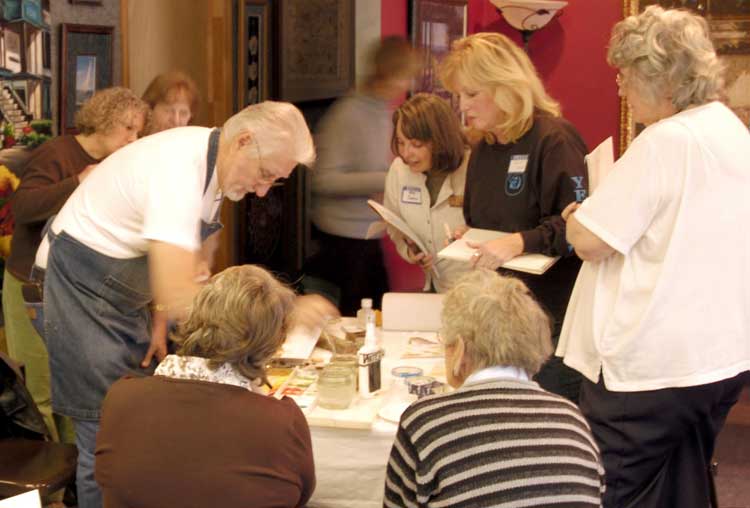
People are always fascinated to watch an artist at work. "How do you do that?" is a common question. Here is a brief example of how Luke Buck creates his wonderful paintings. Luke shows the creation of one of his paintings starting from the reference photos, to the layout drawing and then the step-by-step painting process until the painting is complete - or so he thought. There is a surprise bonus step. This demonstration gives you an insight to the extra effort Luke goes to that make his paintings so good. Take a look at this step-by-step of one of his paintings on this website, from his initial reference material to the final painting. If you really want to see Luke at work and learn how he paints, attend one of his workshops. Click here to go to the Workshop page. |
||
|
||
|
PAINTING DEMONSTRATION - STEP BY STEP - BY LUKE BUCK
"The
Ole Gillian Mill" |
||
|
||
|
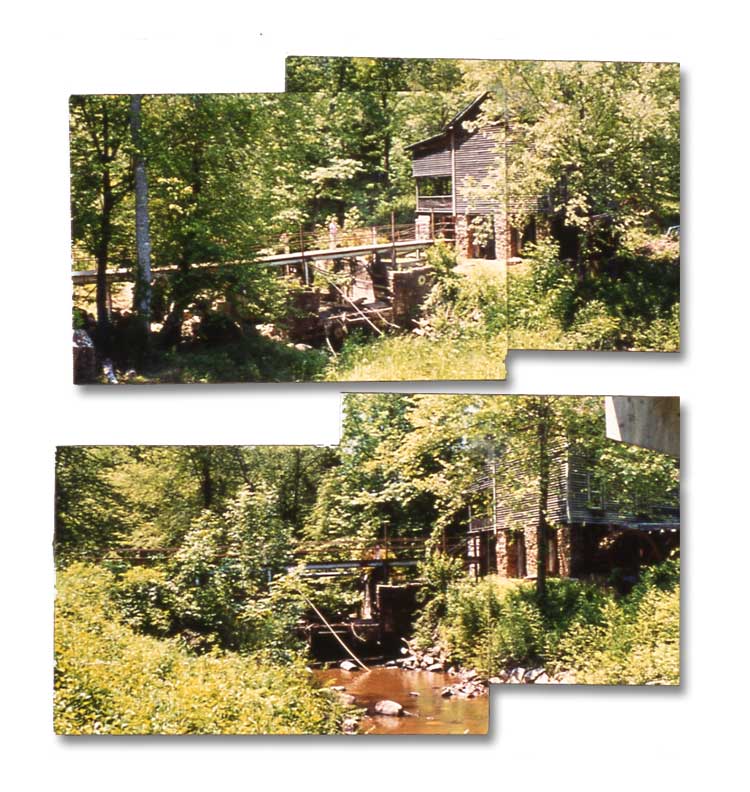
Step 1 - Reference photos Many times while gathering photo reference it's difficult to get a good composition or comfortable painting position of your scene. Such was this painting of the Ole Gillian Mill in Sanford, North Carolina. After circling the mill several times and taking a couple rolls of film, I finally settled on the angle I thought would make the best painting. I was on a rugged, uneven terrain, and under a bridge while trying to get the perfect shot. (You can see a section of the bottom of the bridge on the upper right side of one of the photos.) I wasn't able to get all the detail I wanted in one shot, so as I often do, I took several photos, then tape them together. I prefer this over using wide angle lens because the wide angle lens will distort the perspective somewhat. In one set of photos I got good detail of the mill and bridge, and by moving slightly to the left, I was able to see more of the creek and dam. Between the two references I will be able to sketch in my layout in pencil back at my studio.
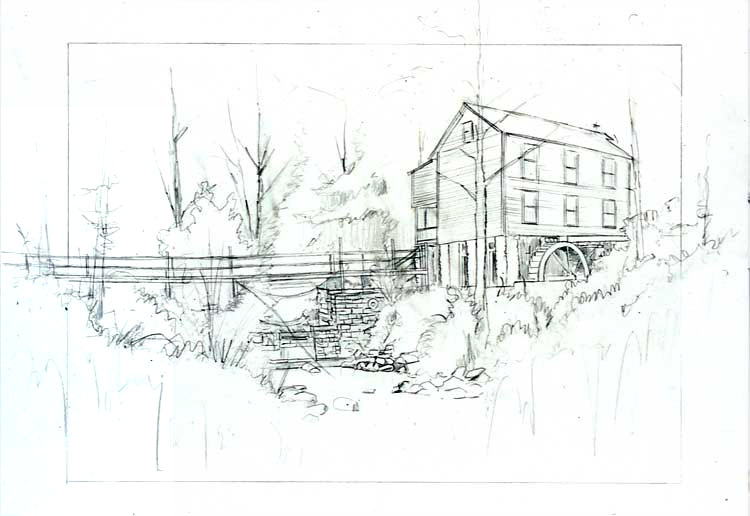
Step #2 - The Layout After returning to my studio, and selecting my photo reference, I proceeded in making the layout. I'm working on Crescent Watercolor Board, cold press, and I chose 20" x 26" for this painting. Using an HB lead pencil, I sketch in the design with all of the primary or basic structures. This is plenty enough detail without going too far with it. Much of it will change as the painting progresses. Most of the trees and foliage will be brush work.
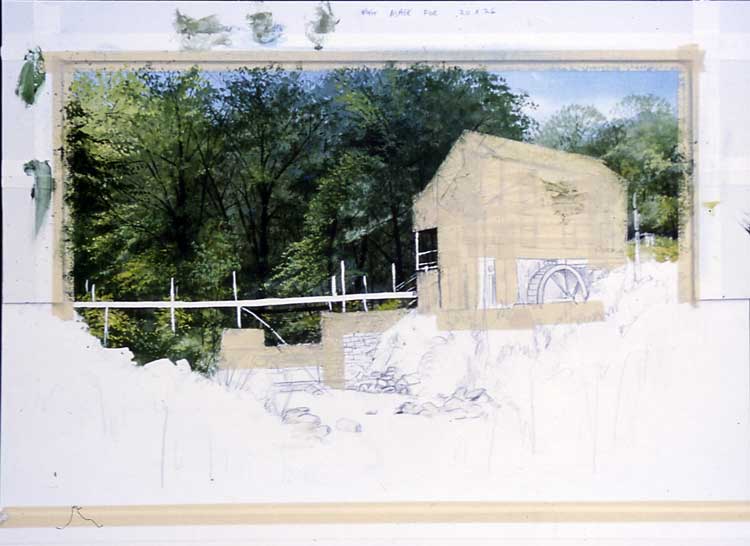
Step # 3 - Masking & Blocking in Choosing this to be one of my "vignette" type paintings, I first drew in my border, approximately 3 inch wide all around. Using paper and masking tape I mask the borders. First I do the top. Then I masked the sides only 1/2 way down to allow breaking the border on the bottom section. Lastly, I mask off across the bottom. To protect the detail that will remain lighter, I use "masking fluid" and "masking tape” on the bridge, the dam, and the mill. A fairly good general procedure is to start at the top of the painting, and the background, and gradually work your way down and forward. For this portion and the foliage I am using my flat wash sabeline brushes, sizes 1 inch, 3/4 inch, and the 1/2 in. All the time working the lights in first and gradually working the darks in between. By mixing "gouache" with the transparent watercolor, I'm able to come back with some lights on top of the darks. Working back and forth with this procedure is like modeling, occasionally adding in dark tree trunks and branches, then add more leaves. Finally it starts evolving into detail. I try to pretty much complete the background before moving to the foreground.
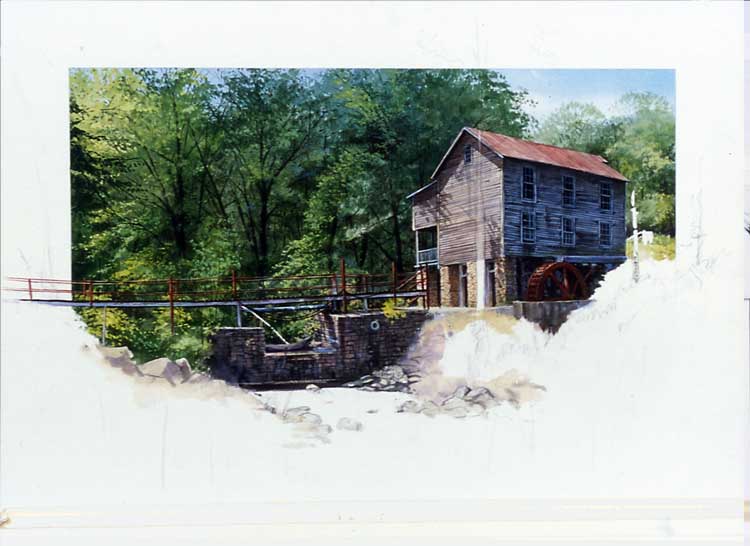
Step # 4. The middle ground First, I must take off all of the masking. Being very cautious to not tear the paper by making certain the paper is 100% dry. Then, clean off all of the extra residue with kneaded and soft erasers. For now, I leave the masking across the bottom in tact. Now we get very involved into the detail. On this painting, here is where the main interest lies. For brushes, I will be using my finest kolinsky red sable rounds, size's 3, and 4. This type of work can seem mechanical but I enjoy trying to define the different textures in the wood, steel, and stone.
Step # 5. Foreground I enjoy working with the water, and did this section first using the sable rounds. Then, getting back into the foreground trees along the front of the bridge and mill, I reverted back to my flat wash brushes, for the leaves and Foliage. Here is where I begin breaking the borders on the sides and the top. Lastly I get into the foreground grasses and weeds. As most of my painting, this is done on dry surface, but while the paint is still wet, I will begin splattering clear water onto the bottom part using an atomizer, and for control, flipping the water filled flat wash brush, off of the end of my finger. After this dries I come back for some final touchup and splattering "wild flowers" into the grasses. After making certain all is dry, I pull the masking tape off the bottom, inspect, clean, and touch up details. I then sign it, and the final touch . . . my fingerprint. BUT. Have you ever done a painting you really liked . . . but something bothered you about it and you just couldn't put your finger on the problem? Well, that is how I felt about this painting. In the last step I will explain.
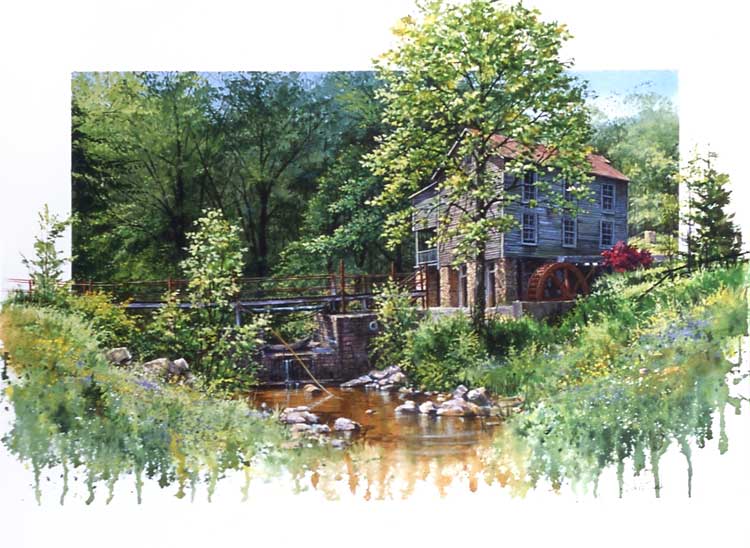
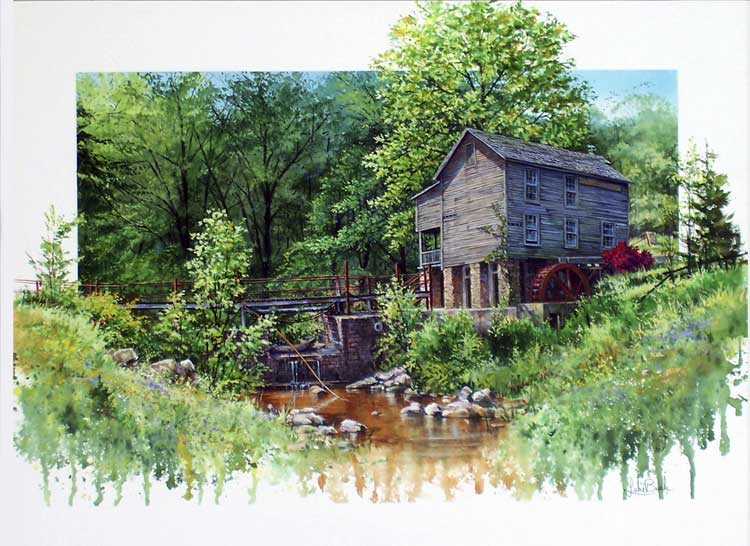
Step # 6 Can't be done? An old cliché . . . "Watercolor has to be done right the first time, because you can't change it once it's down!" "AIN'T TRUE!" After studying, and worrying over this painting for over a year, I finally came to the realization, "That tree is in the way!" The "mill" is the subject, and it's hidden by that tree. It's got to go. I unframed the painting. Then, using my old, wore down, stiff hog hair oil painting brush, I wet the surface of the tree and begin scrubbing. Slowly scrubbing, then blotting, then scrubbing and blotting again. I finally removed most of the evidence of a tree from in front of the mill. The green leaves breaking the top border are unmovable, so realizing the white paper there was permanently stained I didn't even try. After thoroughly drying what was left, I came back in and covered the stains and remaining evidence with zinc white gouache. (You can also use gesso in some cases like this), But I was able to mix the zinc white gouache with the other colors of the mill. I come back with a few cleanups and details with the darks . . . WA-la. Now I'm happy and I’m satisfied with the painting. I am tempted to go back to North Carolina and tell the owner of the mill, he needs to cut that tree down so people can see his beautiful mill.
"The Ole Gillian Mill"
20" x 26" (transparent watercolor and gouache
|
||
About Luke Buck
· Limited Editions ·
Original Paintings ·
Show Schedule ·
Remarques
This is the official Web site of American
artist Luke Buck.
All rights reserved. Use, reproduction or modification of any par,
or image on this site |
||